Showing posts with label sewing. Show all posts

Thursday, December 27, 2012

How To Sew a Changing Table Pad Cover

I've been busy getting Little Brother's room ready.  Tonight I sewed a new cover for the changing table pad.  We have some very nice pink covers from Pottery Barn Kids.  I looked to them as a starting point, but altered my pattern to make the project easier. My cover is made from one large piece of fabric.  I used no-pill fleece from Hancock Fabrics.  My changing pad is a standard contour pad bought at Target about five years ago.

Add 
Changing Table Pad Cover Pattern

I started by cutting out my fabric.


I sewed together the cutout edges, right sides together. (Working at night my lighting isn't the best so the color is a little off!)


Then I folded and pinned a generous hem of 1.5 inches.  This is so the elastic will fit inside the hem.


When I stitched the edges I left the sides open (between the pink pins) to insert the elastic.


My stitches were an inch from the edge to leave room for the elastic.


I used two elastic bands, each 22 inches long.  


I pinned one end of the elastic and threaded it through the hem.


 Then I stitched both ends down.  Last, I closed the open hem.

Changing Table Pad Cover Tutorial

Finished!

Changing Table Pad Cover

This project was very easy and took about an hour total.  I hope to whip out a few more covers this week!


Sunday, February 5, 2012

$5 Chair Covers

I have a little problem.

OK, four little problems.

My dining room chairs.  {{Shudder}}


They are gross.  

This morning I sat in syrup leftover from Lil Bean's french toast breakfast.  I couldn't take it any longer.

Enter $5 canvas painter's drop cloth from Lowes.


I used a large paper to draw a pattern of my seat.  I cut out my pattern allowing an extra half inch on all sides for a seam allowance.


 Each seat cover was made up of three pieces.  The top piece, one long rectangle (3" wide by about 51" long) to wrap around the left side, front, and right side, and a smaller rectangle (about 3" wide by 13" long) for the back.  The back flap is shorter to leave openings for the chair back.   I forgot to take pictures as I was working!  Please forgive me!

Drop Cloth Chair Covers

I simply hemmed the long edge of the side pieces before stitching all of the pieces together.  In just a couple of hours I made four seat covers!  They make my chairs look like new!

Drop Cloth Chair Cover

The best part?  When my little monsters wipe their ketchupy fingers on them or spill milk on them (it will happen) I can throw them in the washing machine.

I almost sprayed them with water-proofing spray I found under the sink (made for outdoor gear) but my husband stopped me and warned me it might not wash well.  Does anyone have experience with this?  What about Scotchgard?  


Sunday, August 21, 2011

iPad 2 Cover with Hand Strap Tutorial

A few days ago my husband surprised me with an iPad 2.  I was completely stressed out over the first week of school and I didn't see it coming.  Yup, he's awesome like that.  

At first I couldn't put it down.  Then I was scared of dropping it.  So I decided to make a padded cover with a hand strap.  Here you can see the finished product.

iPad 2 Cover

I started with fabric scraps and HeatnBond leftover from another project.  A quick trip to Hobby Lobby added ribbon, elastic, and batting.


I used two pieces of 8.5 x 11 paper as a pattern.  If I ever make another cover like this I'll enlarge the pattern a smidge for larger seam allowances.  My seam allowances were about 1/2 inch, which didn't give me much wiggle room.  I'd also add about half an inch of width without cardboard for the fold.  {Did I mention I'm not a professional seamstress?  I've learned a lot from trial and error.  Mostly error.}  


Cut two pieces of fabric for the inside of the cover. 


The bubble fleece worked a lot better in my head than in reality.  
Its just so. stinkin. stretchy.


I used HeatnBond to attach batting to the back of each piece.  I was very careful when ironing the bubble fleece as to not iron out all the bubbles.


I added a ribbon to the left piece for a hand strap.  I attached it using a tight zigzag in four spots (top, bottom, 3.5 inches from top, and 3.5 inches from bottom).  On the right piece I laid out the black elastic to hold the corners of my iPad and pinned.  After removing the iPad I tightened the elastic slightly before securing with another short zigzag.  Next I sewed my right and left piece together.


I pinned my ribbon ties to the edges so I wouldn't forget later.


Now for the outside of my case.  I wanted to use two fabrics so I folded my pattern almost in half horizontally (adding a seam allowance).  A modified "hot dog fold" if you will.  


 I pressed the seam open and added a ruffle ribbon to the right side.


Bonded batting to the back.


Cut two rectangles from a diaper box. They were roughly 7.5 x 9.5 inches.


Sew inside piece (fleece & stripes) to outside piece, right sides together.  Leave top open to insert cardboard.


Turn right side out and press.  Fold top seam in and press.


Sew a straight line down the crease to keep the cardboard in place.  Insert cardboard.


Carefully stitch the top closed.


Ta-da!


Tip Junkie handmade projects

Monday, June 20, 2011

Finished Quiet Books!

I've been frantically working on quiet books for the girls before our upcoming vacation.  Monkey hasn't flown since she was a baby and Bean hasn't ever.  I'm so nervous about how they will do on the plane!  Hopefully these activities will keep them occupied long enough to get us to Florida!


The finished quiet books!

quiet books pages 1:  a shoe to lace and hair to braid

quiet books pages 2 and 3: a tent to zip open, more hair to braid, and a pocket with paper and a mailbox to fill with notes

quiet books pages 4 and 5:  peek-a-boo baby with a woven blankie, snap flowers, beads on pipe cleaners, and velcro tic-tac-toe

quiet books pages 6 and 7: counting beads and a mini flash card alphabet book

 My older daughter helped me look for ideas online and requested many of the pages above.  In each picture the top book is for my younger daughter and the bottom book for my older daughter.  Although I'm sure they'll be trading books as soon as they get bored with their own!

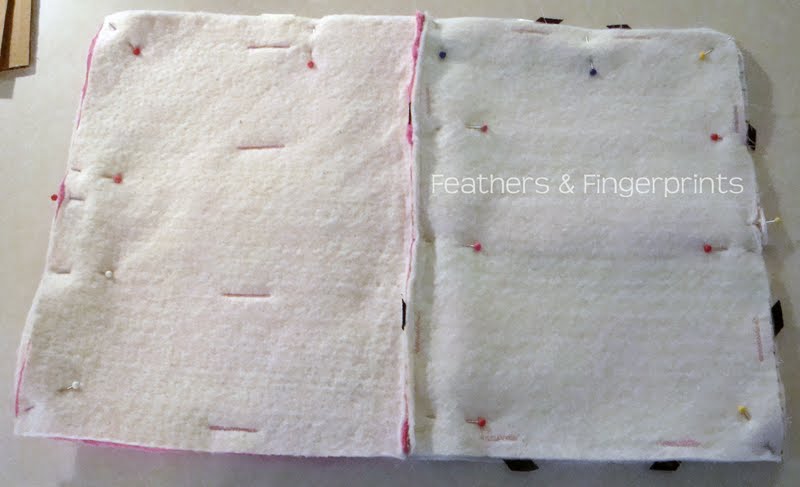
Each page was made from a standard size piece of felt and leftover sewing notations I had around.  As I completed the pages I sewed them back to back with stiff felt in between.  The books are pretty bulky, but should hold up well.  


My inspiration for these books have come from these sources.  Thank you for sharing your ideas!